

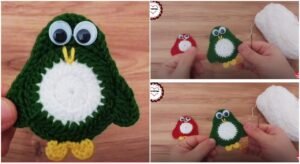
Required Materials and Tools
To make this festive penguin ornament, you will need to gather the following craft supplies:
Main Yarn: Medium weight (Worsted or DK) yarn in Black (or your chosen main body color) and White for the belly panel.
Accent Yarn: A small amount of Orange or Yellow yarn for the beak and feet, and Red or Green yarn if you wish to crochet a tiny festive scarf or winter hat.
Crochet Hook: A 2.5 mm to 3.0 mm hook. Choosing a slightly smaller hook than usual ensures your stitches are dense and tight, preventing the fiberfill from peeking out.
Safety Eyes: One pair of 6mm or 8mm black plastic safety eyes. Alternatively, you can embroider the eyes using black embroidery floss.
Fiberfill Stuffing: Polyester toy stuffing to give your penguin a plump, huggable, three-dimensional shape.
Hanging Element: A piece of festive twine, metallic gold thread, or a thin satin ribbon to loop through the top of the head for hanging.
Essential Tools: A sharp pair of scissors, a yarn needle for seamless assembly, and a stitch marker to track your continuous rounds.
Stitch Abbreviations (US Terms)
MR: Magic Ring
Sc: Single Crochet
Inc: Increase (2 sc in the same stitch)
Dec: Decrease (Invisible decrease recommended)
Ch: Chain
Sl st: Slip Stitch
St(s): Stitch(es)
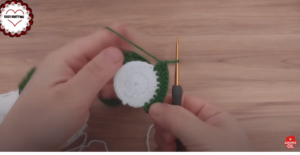
Step-by-Step Penguin Pattern
Phase 1: The Main Body (Continuous Rounds)
Using your main body color (e.g., Black):
Round 1: Start with a MR, crochet 6 sc into the ring. (6 sts)
Round 2: [Inc] repeat 6 times. (12 sts)
Round 3: [1 sc, inc] repeat 6 times. (18 sts)
Round 4: [2 sc, inc] repeat 6 times. (24 sts)
Round 5: [3 sc, inc] repeat 6 times. (30 sts)
Rounds 6–12: Sc in each stitch around. (30 sts)
Note: Insert safety eyes between Rounds 8 and 9, leaving about 5 stitches of space between them.
Round 13: [3 sc, dec] repeat 6 times. (24 sts)
Begin stuffing the body firmly with fiberfill at this point.
Round 14: [2 sc, dec] repeat 6 times. (18 sts)
Round 15: [1 sc, dec] repeat 6 times. (12 sts)
Round 16: [Dec] repeat 6 times. (6 sts)
Fasten off, weave the yarn tail through the remaining 6 stitches, pull tight to close the hole, and hide the thread inside the body.
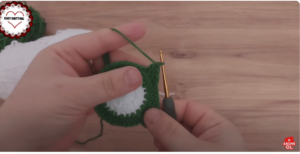
Phase 2: The White Belly Panel
Using White yarn, we work in rows to create a flat oval shape:
Row 1: Ch 5. Starting in the second chain from hook, sc 3, then 3 sc in the last chain. Work down the opposite side of the chain: sc 2, inc in the final st. Join with a sl st.
Row 2: Ch 1, inc, sc 2, [inc] 3 times, sc 2, [inc] 2 times. Join and fasten off, leaving a long tail for sewing.
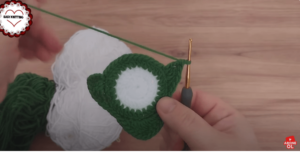
Phase 3: The Wings (Make 2)
Using the main body color:
Round 1: Start with a MR, crochet 5 sc into the ring. (5 sts)
Round 2: [Inc] repeat 5 times. (10 sts)
Rounds 3–5: Sc around. (10 sts)
Flatten the wing and sew the opening closed. Fasten off, leaving a tail.
Assembly and Finishing Touches
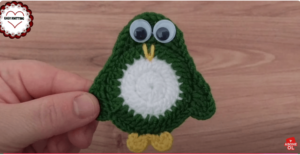
1- Attaching the Belly: Center the white belly panel on the lower front of the penguin body, right below the eyes. Pin it in place and secure it neatly using your yarn needle.
2- Adding Details: Use orange yarn to embroider a small triangular beak centered between the eyes. Sew the wings to the sides of the body at around Round 9.
3- The Hanging Loop: Thread your festive ribbon or twine through the top center of the head, tie a secure knot, and your gorgeous handmade ornament is officially ready to hang!
📌🐧Crochet Penguin Ornament I Crochet Christmas Decorations I Crochet Christmas Ornaments


