
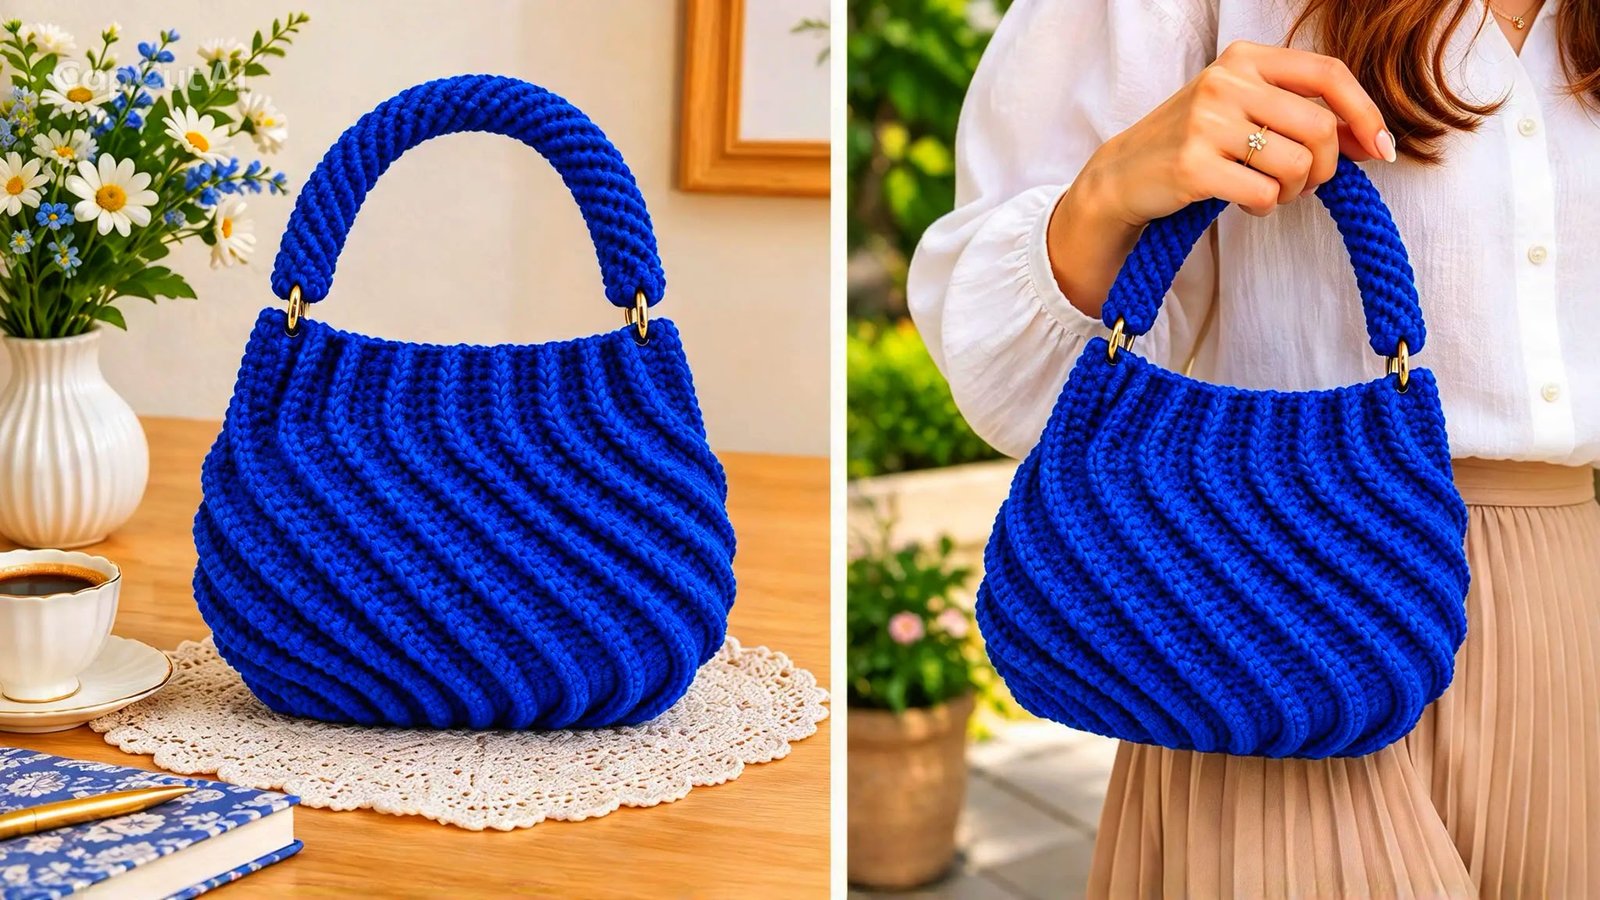
If you are searching for a unique, eye-catching, and functional crochet project, this zigzag wave crochet crossbody bag is the perfect choice . Unlike traditional straight-stitch patterns, this modern textured design features stunning 3D ridges and waves that give the purse a high-end, store-bought appearance . It is an incredibly rewarding project that works up quickly, making it a great addition to your summer wardrobe, daily campus life, or even as a personalized holiday gift.
In this detailed tutorial, we will break down the exact stitch repeats, base measurements, and structural techniques needed to create a sturdy handmade purse . The beauty of this specific model is how it expands beautifully from the inside, giving you plenty of space while remaining compact on the outside . Let’s dive straight into the required crafting supplies and the step-by-step process.
🧵 Materials Needed (Required Supplies)
To achieve the precise structure and elegant stitch definition seen in this pattern, choosing the right medium-weight cord is essential .
- Yarn: 300 grams of Premium Cotton Macrame Yarn (approx. 1.5 mm thickness) . You can also substitute this with chain yarn (silsila) or classic polyester macrame cord depending on your texture preference .
- Crochet Hook: 3.5 mm crochet hook to maintain a tight and crisp tension .
- Scissors: For trimming your ends cleanly.
- Yarn Needle: Essential for assembling the bag panels and weaving in loose strands .
- Stitch Markers: A must-have tool for tracking your initial base corners and rows .
📐 Step-by-Step Zigzag Crochet Bag Guide
Step 1: Crocheting the Oval Base
Every great bag starts with a solid foundation. You will begin by chaining 14 stitches plus 1 turning chain (15 total). Work continuous single crochet rows around both sides of the chain. To create a flat, seamless oval base, increase your stitches precisely at the turning curves. Continue increasing for three full rounds until your base measures approximately 10.5 cm in length and 4 cm in width.
Step 2: Working the Body and Wave Pattern
Once the base is complete, do not slip stitch normally. Turn the piece slightly to begin working vertically to form the 20 cm high body of the bag. The distinct zigzag wave effect is created through a dynamic 4-row repeat technique ():
- Row 1: Work a series of single crochets, skip a stitch to create a decrease (the top dip of the wave), and add increases near the base.
- Row 2: Work a combination of single crochets and half double crochets to build height and define the texture.
- Row 3-4: Utilize a special technique where you work single crochets strictly into the front loop only (FLO). This horizontal ridge creates the striking 3D wave aesthetic.
Repeat these four rows all the way around the circumference of your oval base until the panels meet .
Step 3: Seaming and Creating the Cord Handle
After reaching your desired width, align the edge loops perfectly and use a slip stitch or invisible seam to close the side of the bag tightly. For the ultimate handmade finish, you can crochet a matching sturdy tubular cord handle. Chain 7 stitches, join them into a small ring, and work single crochets into the back bumps to form a thick, durable strap that won’t stretch over time (. Securely attach the strap to the upper rims, add an optional fabric lining or zipper, and your new purse is ready (.
💡 Pro Tips for Cotton Macrame Yarn
Working with 100% cotton macrame cord ensures your bag won’t sag when carrying heavy items like phones or keys. Because the cord is tightly twisted, ensure you maintain an even, firm hook tension throughout the front-loop rows. If you want a more casual or casual look, you can easily attach a sleek metallic chain strap or leather accents instead of the crocheted handle .
How do you create aunique and stylish nev crochet bag dedign ?
Please follow and like us:


