
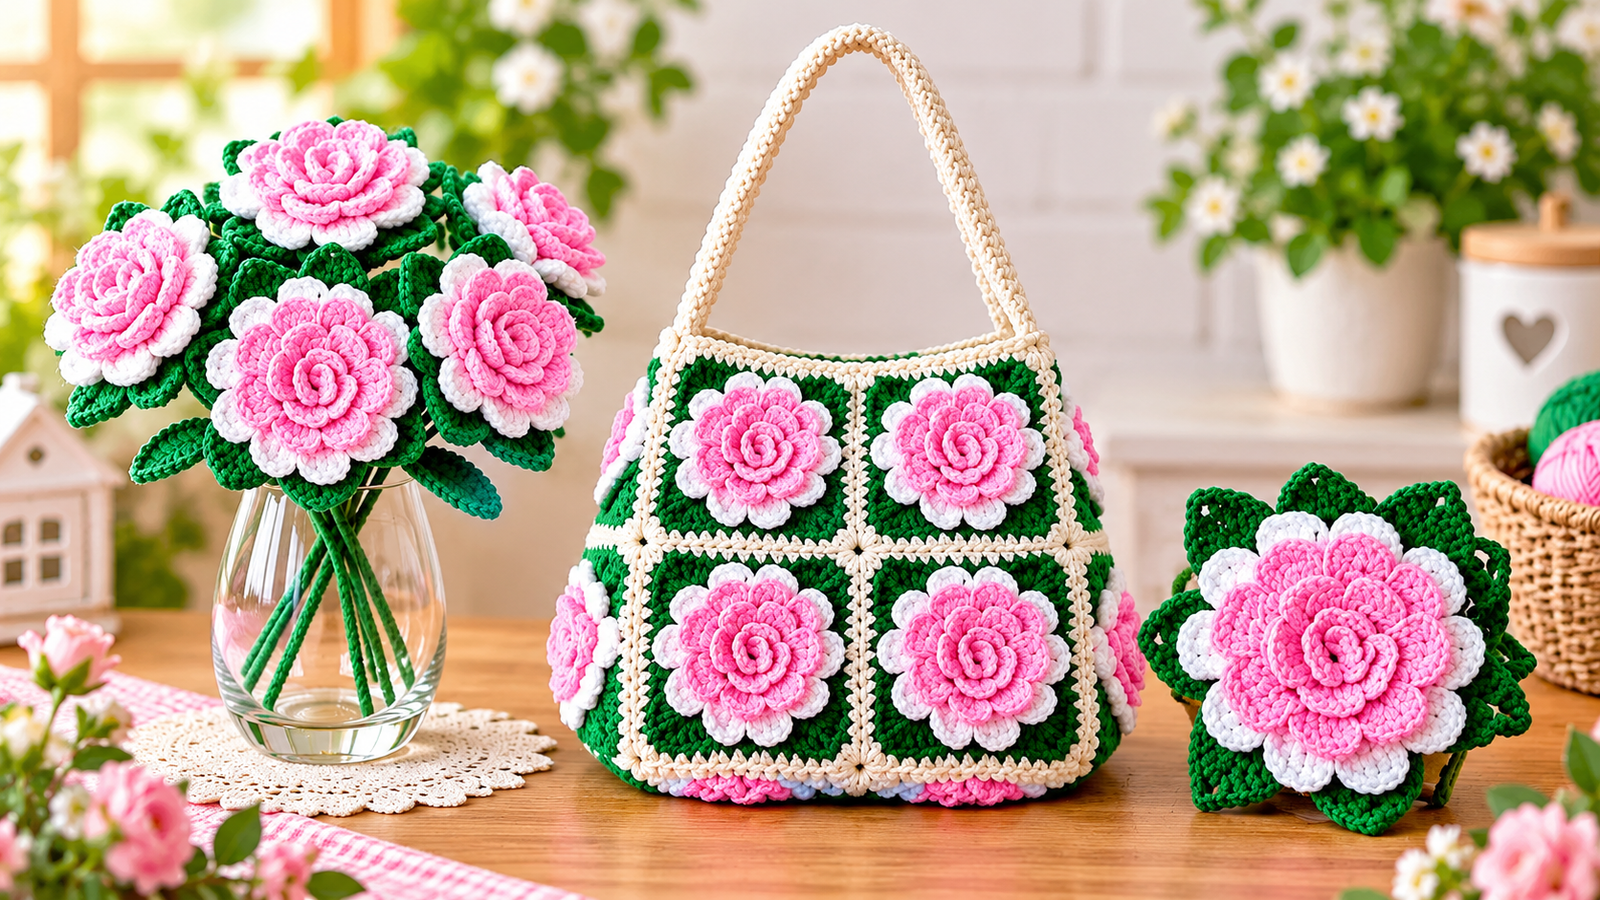
Are you looking for the perfect floral motif to upgrade your next handmade project? Look no further! In this comprehensive, beginner-friendly step-by-step crochet tutorial, we are diving deep into the art of textured fiber arts to create a gorgeous 3D layered rose flower with green leaves. This stunning, high-relief floral embellishment adds depth, color, and a professional touch to any design, making it an essential skill for every passionate crocheter.
Whether you want to embellish custom tote bags, stitch together cozy winter blankets, decorate cozy beanies, or create eye-catching clothing appliqués, this versatile 3D crochet flower pattern is exactly what you need. Let’s grab our yarn and hooks and get started on this beautiful craft journey!
Why You Will Love This 3D Layered Rose Pattern
Unlike flat flower motifs, this specific pattern utilizes a unique layered stitch technique that builds dimension from the center outward. By working into the front and back loops of your foundation chains, you will create lifelike, volumetric petals that pop right off the fabric. Additionally, the contrasting border and the integrated backing leaves provide a clean, structural finish that makes the entire motif incredibly easy to sew onto other crochet or knitted pieces.
Required Materials and Tools
Before we begin executing the stitches, make sure you have gathered all the necessary craft supplies. For the best structural results, we recommend using a crisp, high-definition yarn.
Yarn: High-quality Cotton or Acrylic medium weight yarn (4-Ply / Worsted weight, Number 4) in three distinct colors:
Pink: For the soft, vibrant inner rose petals.
White: For the crisp, clean outer petal borders.
Green: For the structural, pointy backing leaves.
Crochet Hook (Tığ): 3.5 mm (US E/4) or 4.0 mm (US G/6) depending on your personal tension.
Scissors (Makas): For clean yarn cuts.
Yarn Needle (Tapestry Needle): Crucial for seamlessly weaving in loose yarn tails.
Stitch Markers: To accurately track your row transitions and stitch counts.
Pink: For the soft, vibrant inner rose petals.
White: For the crisp, clean outer petal borders.
Green: For the structural, pointy backing leaves.
Crochet Hook (Tığ): 3.5 mm (US E/4) or 4.0 mm (US G/6) depending on your personal tension.
Scissors (Makas): For clean yarn cuts.
Yarn Needle (Tapestry Needle): Crucial for seamlessly weaving in loose yarn tails.
Stitch Markers: To accurately track your row transitions and stitch counts.
Step 1: Building the Foundation and Core Petals
The journey to creating a voluminous 3D rose begins with a solid foundation. You will start by forming a magic ring or a short chain loop using the pink yarn. The magic of the layered effect lies in working into different loops of your stitches. By utilizing basic crochet stitches like the slip stitch, half double crochet, and double crochet, you will build multiple tiers of petals that naturally curl upward, creating a lifelike, volumetric rose bud.
Step 2: Adding the Contrasting Outer Edges
Once the main body of the rose is complete, it is time to make the details pop. Switch to your secondary white yarn to create a clean framing border around the tip of each pink petal. This contrast border defines each individual layer, making the flower look much more detailed and visually striking from a distance. It bridges the transition between the colorful center and the green backing.
Step 3: Crocheting the Integrated Green Leaves
A true 3D rose motif is incomplete without its foliage. Instead of crocheting leaves separately and sewing them on later, this pattern seamlessly integrates them into the back of the flower. By joining your green yarn to the remaining unworked loops at the base of the rose, you will stitch structural, pointy leaves. These leaves peak out elegantly from underneath the petals, providing a sturdy, flat base that makes the entire motif incredibly easy to sew onto other fabrics.
A true 3D rose motif is incomplete without its foliage. Instead of crocheting leaves separately and sewing them on later, this pattern seamlessly integrates them into the back of the flower. By joining your green yarn to the remaining unworked loops at the base of the rose, you will stitch structural, pointy leaves. These leaves peak out elegantly from underneath the petals, providing a sturdy, flat base that makes the entire motif incredibly easy to sew onto other fabrics.
Creative Applications for Your Finished Motif
Now that your 3D layered rose is complete, the creative possibilities are endless! This sturdy motif can be easily blocked with a light steam iron to ensure the leaves lay perfectly flat. You can sew it onto the corners of a crochet blanket, patch it onto a denim jacket, or glue it onto a hairclip. Mix and match different color combinations to match every season!
Please follow and like us:


