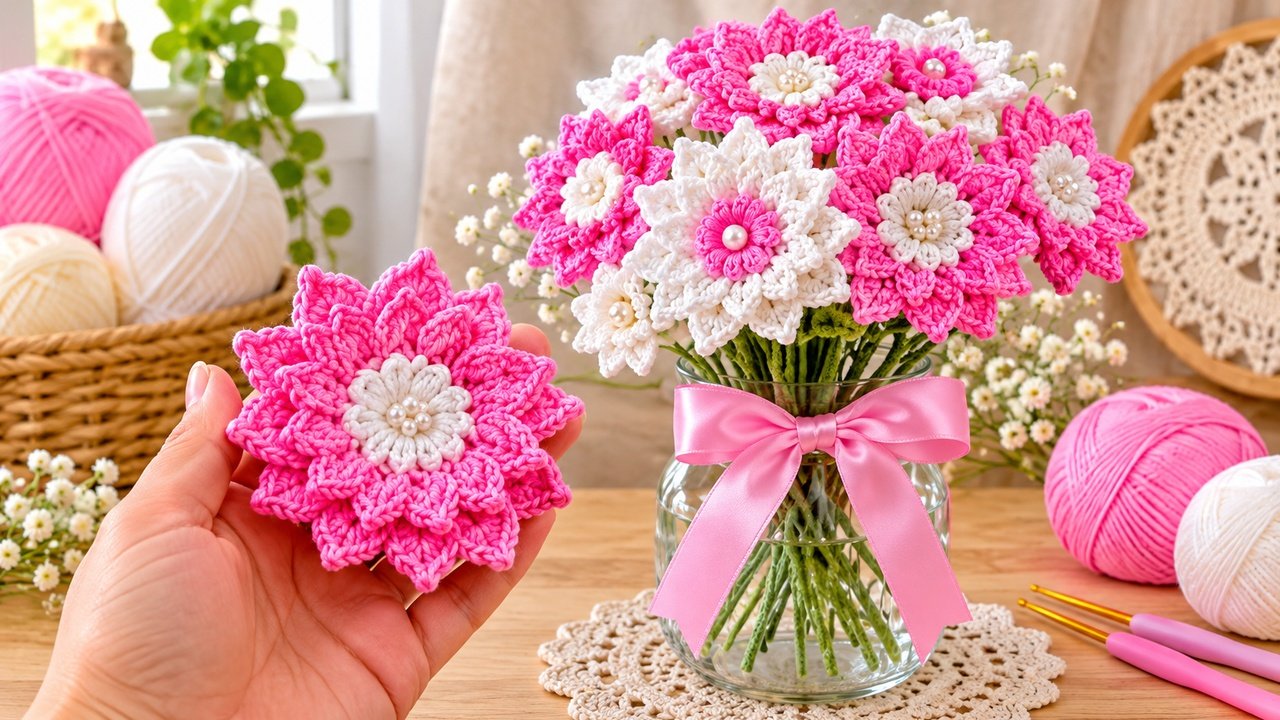
Welcome to another exciting yarn project! Today, we are going to explore how to crochet a beautiful 3D flower that is absolutely perfect for adding a touch of elegance to any handmade creation. If you have been searching for a quick, charming, and highly rewarding crochet project to elevate your skills, you are in the right place.
Standard flat crochet flowers are lovely, but creating a tiered, multi-dimensional design adds a gorgeous layer of texture and realism to your work. These miniature floral masterpieces are incredibly popular right now. They require very little yarn, take minimal time to complete, and bring instant aesthetic joy. Whether you want to assemble a vibrant handmade flower bouquet, customize your hair accessories, embellish a plain winter beanie, or style up creative home decor accents, this beginner-friendly design is an absolute must-try.
In this comprehensive DIY guide, we will break down everything you need to know to create your very own layered tığ işi flower blossom from scratch. Grab your favorite yarn hooks, settle down in a cozy corner, and let’s dive straight into this relaxing craft project!

how to crochet a beautiful 3D flower
Materials Needed for the 3D Crochet Flower
Before we begin stitching our gorgeous petals, let’s look at the basic craft supplies required for this project. You can choose any color combination you like to customize your blossom!
- Yarn: Soft cotton yarn or acrylic yarn in two contrasting colors (for example, White for the core base and Pink for the blooming petals).
- Crochet Hook: A 2.5 mm to 3.5 mm hook size, depending on your choice of yarn thickness.
- Scissors: For cutting yarn tails cleanly.
- Yarn Needle: Essential for weaving in loose ends securely and assembling pieces.
- Pearl Bead: One beautiful faux pearl bead to decorate the exact center of your finished flower.
- Craft Glue: Optional, to help secure the pearl bead placement firmly.
Step-by-Step 3D Crochet Flower Guide
Step 1: Crafting the Center Core
To begin, take your first yarn color (such as white) to form the base foundation. Start by making a slip knot or a magic ring, which provides the perfect adjustable circle for starting projects in the round. Chain a small loop or work a series of single crochet (sc) stitches directly into the ring. This forms the tight, neat circular core where our decorative pearl bead will sit at the very end. Once completed, slip stitch to join the round, fasten off, and get ready to introduce your vibrant main petal color.
Step 2: Setting the Foundation for Layered Petals
The secret behind a stunning 3D look lies in creating back-loop or chain-space anchors that allow multiple rows of petals to sit beautifully on top of one another. Attach your petal yarn color (such as pink) to the core stitches. Work a series of repeating chain arches (e.g., chain 3, skip a stitch, single crochet into the next) all the way around the ring. This sequence forms an invisible structural grid behind the core, providing the perfect attachment points for our blooming rows.
Step 3: Crocheting the First Layer of Blooming Petals
Now, it’s time to bring the flower to life! Into each of the chain arches you created in the previous step, you will work a combination of stitches to build a smooth, rounded petal shape. Slip stitch into the first arch space, chain 2, then work multiple double crochets (dc) or treble crochets (tr) into the same space, finishing the petal with a chain 2 and a slip stitch. Repeat this exact stitch recipe in every single arch around the center. You will watch a beautiful flat blossom emerge immediately under your fingers.
Step 4: Adding the Elegant 3D Petal Tier
To achieve the luxurious, heavy 3D effect, we need to build another row of petals directly underneath or behind the first set. Slip stitch your yarn down into the remaining unworked back loops of your foundation circle. Create a new set of chain arches, making them slightly longer than the first round (for instance, using chain 4 or chain 5 spaces). Once your underlying foundation loop is ready, work a larger combination of stitches into these spaces—such as a mix of half double crochets, double crochets, and treble crochets—to create a tier of wider, fuller petals that frame the inner row beautifully.
Step 5: Finishing Touches and Embellishments
Fasten off your yarn, leaving a short tail for weaving. Thread your yarn needle and carefully weave the loose ends through the back stitches of the flower to ensure everything stays perfectly neat and hidden from view. To finish your project with a high-end boutique touch, thread a small amount of yarn or place a drop of craft glue into the center of the core. Securely attach your pearl bead to give the flower an elegant, polished focal point. Gently fluff up the layered petals with your fingers to maximize the gorgeous 3D volume!
Creative Ways to Style Your Crochet Flowers
The best thing about learning how to crochet an easy 3D flower is just how incredibly versatile the final piece is! Here are a few creative ways you can use your new handmade creations:
Handmade Flower Bouquets: Make multiple flowers in a variety of vibrant spring colors, attach them to green floral wires, and assemble a gorgeous, everlasting amigurumi bouquet that makes a perfect gift for Mother’s Day, birthdays, or weddings.
Charming Hair Accessories: Glue or sew your completed 3D blossom onto blank metal hair clips, elastic headbands, or hair ties to create unique, adorable accessories for kids and adults alike.
Boutique Garment Accents: Applique these texture-rich flowers onto the corners of cardigans, tote bags, scarves, or hats to turn a simple wardrobe staple into a custom, high-end fashion statement.
Whether you are a beginner picker just learning the ropes or an advanced fiber artist looking for a relaxing, quick project to use up leftover yarn scraps, this 3D flower pattern is guaranteed to bring a smile to your face. Happy crocheting, and don’t forget to share your beautiful finished blooms with the community!
How to Crochet a Beautiful Flower 🌸 | Easy 3D Crochet Flower Step by Step


