
Hello everyone and welcome back to my crochet corner! Today, I am incredibly excited to share a very elegant and classic project with you: the magnificent crochet spider motif model. If you are looking for a unique, eye-catching design to make gorgeous baby blankets or bedspreads, this pattern is absolutely perfect. It looks incredibly sophisticated, yet it is surprisingly easy to follow once you get the hang of it.
In this guide, we will look at how to create these beautiful motifs and connect them together to create seamless, stunning projects. Grab your hooks and let’s get started!
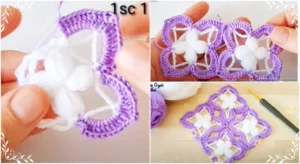
Materials Needed for This Project
To get the best result for this motif, I highly recommend using two different types of yarn to give the texture a beautiful contrast:
For the Center (Puff Stitches): Soft baby yarn. Using baby yarn makes the puffs look much more structured, neat, and voluminous.
For the Borders (Edges): Mercerized cotton yarn. Mercerized yarn gives a crisp, shiny finish to the outer stitches.
Crochet Hook: A 2.5 mm hook works beautifully with these yarn weights.
Tools: Scissors and a needle to weave in your ends.
For the Center (Puff Stitches): Soft baby yarn. Using baby yarn makes the puffs look much more structured, neat, and voluminous.
For the Borders (Edges): Mercerized cotton yarn. Mercerized yarn gives a crisp, shiny finish to the outer stitches.
Crochet Hook: A 2.5 mm hook works beautifully with these yarn weights.
Tools: Scissors and a needle to weave in your ends.
Step-by-Step Instructions
Step 1: Creating the Foundation Ring
Start by making a secure slip knot on your hook.
Chain 6 to create the foundation.
Insert your hook into the very first chain stitch and work a slip stitch to form a small ring/circle. This will be the base for our center stitches.
Step 2: The Center Puff Stitches and Loops
Chain 1 to secure your yarn, then pull your loop up to elongate it.
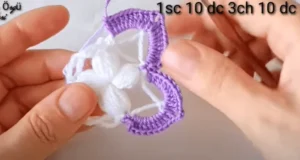
First Puff: Yarn over, insert your hook into the center ring, and pull up a loop. Repeat this until you have 6 loops on your hook (a 6-wrap puff stitch). Pull through all loops and chain 1 to close the puff.
The Chain Loops: Pull your loop up, grab the working yarn, and complete a long single crochet stitch to create a secure elongated loop. Repeat this one more time so you have a double loop structure extending from the puff.
Repeat: Continue making puff stitches followed by these beautiful elongated loops around the ring until you have exactly 4 puff stitches in the center. Fasten off the baby yarn.
Step 3: Working the Borders with Mercerized Yarn
Attach your lila or contrasting mercerized yarn to the top of any puff stitch.
Work 9 double crochet stitches into the first set of elongated loops.
When you reach the peak between the loops, work 1 double crochet, chain 3, and work another double crochet into the exact same space to create a beautiful corner.
Work another 9 double crochechets down the next side. Secure with a single crochet on top of the next puff stitch. Repeat this all the way around to complete your square motif.
How to Join the Motifs Together
The true magic of this pattern happens when you start connecting the pieces together to form a larger fabric, like a blanket.
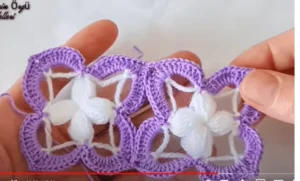
To join them seamlessly, work your first motif completely. When working on your next motifs, stop at the corner chain-3 spaces. Instead of chaining 3 normally, chain 1, insert your hook into the corresponding corner of the finished motif, pull through a slip stitch, chain 2, and continue your double crochets. By slip-stitching the corners and sides together while you crochet, your motifs will blend perfectly without any bulky seams!
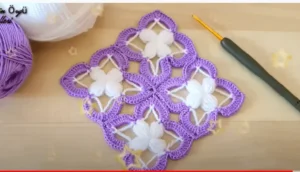
Once you join enough motifs, you can use a darker or lighter shade of your border color to create a stunning frame for the entire blanket.
Thank you so much for crafting with me today. I hope you enjoy creating this beautiful spider motif pattern as much as I did. Happy crocheting, and see you in the next project!
Please follow and like us:


